Showing posts with label Casserole. Show all posts

Monday, December 10, 2012

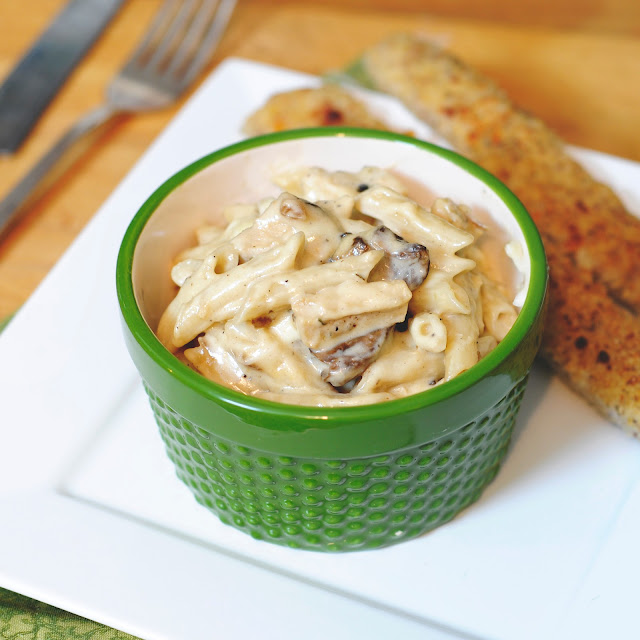
Chicken and Mushroom Alfredo


I love the combination of chicken and mushrooms together.  When you add a rich creamy sauce and some noodles you have a wonderful bowl of comfort food.

I don't use canned cream of anything soups.

WHY?

They are all usually made with wheat and other products that I don't care to feed my family.  When I need a cream base for soups or casseroles I start with three ingredients: butter, rice flour and milk or cream.

This gives me a rich thick white cream sauce to start my recipe with. Kind of like a blank canvas that a painter may use to start their drawings.

Once this is made, then I will add flavor to make the cream sauce go with my entree.  I add this flavor with cheese, fresh herbs, spices and veggies.

For this dish, I used parmesan cheese, minced garlic and sauteed mushrooms to add the flavor boost. When combined with the noodles and chicken you get a warm creamy alfredo style pasta dish.

The meat that you are adding to a creamy dish can also help add flavor.  A chicken breast can be seasoned with garlic salt, onion powder, dried herbs, salt and pepper then sauteed in olive oil for  added depth to the entree.

I built the flavors for this easy casserole  with the sauce, the sauteed mushrooms, onion and garlic and then the sauteed chicken breast.

When they all came together into the casserole it was a pleasant blend of texture and taste.

I have made this dish in a 9X13 casserole pan as well as in individual ramekins.

I also used gluten free noodles to make my                                                 casserole.  Regular wheat noodles can be used too.

Cooking from scratch does not have to be hard once you learn a few basics recipes.  Having a red and white sauce in your repertoire of recipes is a great place to start so that you can start saving money by not buying the expensive cans, and also by sharing with your family, food made with real ingredients.

Recipe:  Chicken and Mushroom Alfredo

4 cups of chicken, sliced or diced into small pieces
2 cups of fresh mushrooms, sliced
1/2 red onion, diced
1 teaspoon of garlic, minced
olive oil to saute
1/2 cup of butter (1 stick)
1/4-1/3 cup of brown rice flour (the more you use the thicker the sauce will be)
2 cups of cream (I have also used 1 cup of milk and 1 cup of cream)
1/3 cup grated parmesan cheese
dash of salt1 box of penne pasta, cooked and drained
fresh mozzarella cheese to top casserole with.

Preheat oven to 350.

Prepare noodles according to the directions on the box.  When cooked, drain and set aside.
In a saute pan, add chicken and a splash of olive oil.  You can use salt, pepper, garlic salt and onion powder to add flavor to the chicken breast.  I don't measure I just start shaking and eyeballing it.

Cook meat until no longer pink.  Remove pieces to a bowl.

Return pan to oven and a splash more oil and add mushrooms, onions and garlic.  Saute until mushrooms are soft.  (3-5 minutes)

In a pot on the stove melt the butter, add the flour and stir.  Add the milk and bring to a boil, stirring so that the flour does not stick to the bottom of the pan.  Once thick, remove from heat and add parmesan cheese.  Stir to combine.

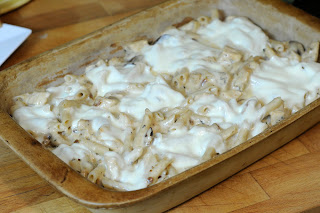
In a large bowl combine chicken, sauteed mushroom mixture, alfredo sauce and noodles.  Spread in a 9X13 pan or portion in small ramekins.

Place mozzarella over the top of casserole.  Bake for 10-15 minutes, enough time to melt the cheese and warm any ingredients that may have cooled while waiting for the other items to be done.

Remove from oven and serve.


Written by Sherron Watson


Monday, December 3, 2012

Cheesy Meat Casserole


I have had lasagna made with some pretty unique ingredients.

I love how people have their own interpretations on food dishes.  The combinations that I remember the most and are quite good but very different are: one made with Velveeta and one made with pepperoni.

Mr. Thompson always made his lasagna with slices of pepperoni and I thought it was super good.  The pepperoni added a bit of spiciness to the dish and it was quite the conversation piece when everyone figured out what his secret ingredient was.

The second unique lasagna that I remember is the one Cory's Mom used to make.  It was super easy and simple.  The secret ingredients were chopped black olives and Velveeta Cheese.

Every once in a great while I will buy a small brick of Velveeta Cheese.  We try very hard to stay away from overly processed foods and this one just screams processed to me.

I asked on my fan page if anyone had ever made the "From Scratch" version that is floating around on Pinterest.  Several had with varying results.

Most of the comments were recommendations of the types of cheese that I could use to get the same creamy cheesy texture of the dish.

I took their suggestions and headed to Whole Foods to chat with the cheese man.  I actually think he was a boy (lol, kids are looking younger and younger to me). He also recommended the same types of cheese.

I decided to go with the recommendations and this amazing dish was created at home.

OH WOW…the cheese combination is so good!

The three cheeses that were suggested and used are: gruyere, triple cream and fontina.  I will tell you that these three cheeses can be purchased in a wide range of prices.  WIDE…like ultra cheep to super expensive.

I went for the mid priced range and spent, are you ready….$20.00 on cheese.

I know, too much?  Never!  The cheese is what makes the dish so delicious.  If you want a top product you must be willing to spend the money for the result you want.

Will this dish get made often in my home? Probably not. I am thinking twice a year.  Twice a year I can spend the extra money to have a delicious in-my-home meal.

For those that want to try the Velveeta version, I have added the amount needed.  I will tell you that the cheese makes the dish a bit soupy right out of the oven (this never bothered me) so you may want it to sit for a few extra minutes.

I also don't have gluten free lasagna noodles so I used a whole box of wide rice noodles and it worked great.

This dish makes great left overs and a perfect casserole to share with neighbors that may be in need of an easy dinner.

ENJOY!

Recipe:  Cheesy Meat Casserole

1 pound of hamburger, browned
3 cups of homemade spaghetti style sauce  RECIPE HERE
1 box of rice noodles or 6-8 wide lasagna noodles, cooked according to package
1 small can of sliced black olives, drained
1.5 cups of gruyere, grated
1 small wedge of triple cream cheese (similar to Brie), sliced with mold removed
1.5 cups of fontina cheese

NOTE: If using Velveeta, use enough cheese, sliced in thin slices, to cover two layers.

Have your meat browned, cheese grated or sliced and noodles cooked.

Preheat oven to 400 degrees.

In a bowl add sauce to meat and stir.  You don't want you sauce to be too runny.

In a rectangular baking dish (9X13) start layering ingredients.

I did meat on the bottom, olives sprinkled, cheese, noodles and repeat.  I topped my dish with a final sprinkle of cheese. I also mixed the cheese's up on each layer (this is your choice).

Cover with foil and bake for 20-25 minutes or until bubbly.

Let rest for 10 minutes once removed from oven.


Friday, November 9, 2012

Shepherd's Pie (lamb) or Cottage Pie (beef)


Hello my pretty (see picture above)!

Yes, another all-in-one dish to end our week of yummy casserole style dishes.

I must interject a quick snippet of information here.  I grew up eating this version under the guise that THIS was Shepherds Pie, what I was actually eating was Cottage Pie.  So what is the difference?  That would be the meat.  A traditional Shepherd's Pie is made with ground lamb and a Cottage Pie is made with ground beef (the picture above).

I grew up eating this shepherds pie and to say it was my least favorite dish is an understatement.  As a kid I did not like my stuff touching each other and the thought of eating a cooked carrot was enough to make me gag, and gag and then gag some more.

I am sure my parents thought I was pretending, but I was not.  Carrots that had been cooked in my mind was like cryptonite to superman, they zapped my powers.

Fortunately my taste buds and sensitivity to cooked carrots changed as I became an adult.  Maybe I cook them different or the fact that I use fresh carrots and not frozen or canned helps too.

I decided to make this dish for my family when school started.  I desperately needed a few things in the fridge that the kids could grab and warmup in the microwave.  The problem is that when I made it they ate the whole thing…LOL

There were no leftovers.  The combination of mashed potatoes and ground beef kept them coming back for more.

This recipe is a general style of what you will find if you google the dish, but I like to add a bit of ranch to my mashed potatoes and I leave out the peas.  I know some recipes call for corn and next time I plan on trying that.

You can make this in a 9X13 casserole dish or use a stoneware bowl to cook the shepherds pie in.  I think this recipe would also make great individualized cups if you have the ramekins on hand.

Rachael Ray Stoneware 9x13 lasagna baker -white (Google Affiliate Ad)

Share with me your thoughts on how you prepare shepherds pie, I know there are a lot of variations to the recipe.

ENJOY!

Recipe:  Shepherd's Pie

2 tablespoons of butter
1 large onion, chopped fine
1 teaspoon of minced garlic
2 pounds of ground beef OR ground lamb
4 tablespoons flour (I use brown rice flour for a gluten free version)
2 tablespoons of tomato paste
2 cups of chicken broth
1/4 cup of heavy cream
2 tablespoons of Worcestershire Sauce
2 cups of shredded fresh carrots

Topping

2 1/2 pounds potatoes, peeled and diced
1 teaspoon salt
6 tablespoons of butter
2 tablespoons of cream cheese
1/4 cup of parmesan ranch dressing (recipe below) or plain ranch


In a large stock pot, add salt and diced potatoes.  Cook until tender.

While potatoes are boiling, make meat sauce.

Melt butter, add onion and garlic. Cook 3 minutes.  Add meat and brown.  Add flour and tomato paste and cook 2 minutes.  Sauce should be dark in color.

Add broth, cream, worcestershire sauce and simmer over medium heat.  Simmer until ground beef mixture starts to thicken (6-8 minutes).  Remove from heat.

Preheat oven to 425.

When potatoes are done boiling, drain and add butter, cream cheese and ranch.  Using a potato masher, mash until potatoes are smooth.  Small pieces are okay, my family likes it this way better.

NOTE:  I do not cook my shredded carrots, they turn out just fine by adding them raw to the dish and having them bake.  You can also use drained canned or frozen carrots.

In a 9X13 dish, add meat mixture, a layer of carrots and finally the mashed potato topping.

Cover with foil.

Bake for 35-40 minutes.  If you would like the topping to be dark brown, remove foil and broil for a few minutes.

Let cool for 10 minutes and serve.


Recipe:  Parmesan Ranch Dressing

1/4 cup of sour cream
1/4 cup of mayonnaise
1 tablespoon fresh lemon juice
1/4 teaspoon of garlic powder
1/2 cup of finely grated parmesan cheese
2 tablespoons of finely chopped green onion
1/4-1/2 teaspoon of salt
dash of pepper

Combine all of the ingredients together in a small bowl.  Serve immediately or refrigerate.

NOTE:  If you wish to make this thinner, add a small amount of milk or buttermilk.  Shake or stir really well.

I have not tried substituting yogurt for the sourcream or mayonnaise, but this is an option if you are trying to reduce fat.


Wednesday, November 7, 2012

Chicken Florentine, Individual Portions


 I found these cute little ramekins at Target right before Halloween. I had planned on using them for a recipe to be featured in the magazine I write for but totally forgot about them.

This would and will not be the first time I forget about a prop that I have purchased…LOL

My house is full of odd plates, bowls and silverware.  Nothing really matches and I rarely have more than two of any one thing.

It's a bit eclectic come dinner time.  I try to stick to basic white when it comes time to buy sets of bowls and plates in large numbers.  This makes the addition of all of my little mismatched dishes work in perfect harmony.

I have made this recipe before from the 2009 edition of Cooks Country magazine and it turns out great every time.

I decided I would make it again but do them in the ramekins.  It worked great and made cleanup so much easier.  Leftovers were a piece of cake.  All I did was cover them up with Saran Wrap and refrigerate. The kids could microwave the leftovers without any issues.

I served mine in the ramekin with a salad on the side of a large plate.  For the purpose of pictures and so that you could easily see the combination of chicken, spinach and sauce, I spread it out on a plate below.


When you finally add the ramekins to be broiled, remember that everything is already cooked.  All you are doing when you add it to the oven is melting the cheese.  The reason this is important to know is because you are working with a cream based sauce and over cooking it can cause it to break down and get runny.  It still taste really good, just not as creamy.

There are lots of recipes that can be made into individualized portions.  Some of my favorites are lasagna, shepherds pie and eggplant parmesan.

Do you have a delicious dish that you like to make in single portions?  If so, leave a comment below and share. I am always looking for new ideas of great recipes.

Recipe: Chicken Florentine
Makes 8 individual sized portions

2 tablespoons olive oil
8 cups of fresh spinach, washed and dry
4 cups of cooked chicken, cubed
1/4 cup of onion, finely diced
2 garlic cloves, minced
1 1/4 cups chicken broth
1 1/4 cups of water
1 cup of heavy cream
6 tablespoons of grated parmesan cheese
1 teaspoon of grated lemon zest
1 teaspoon of lemon juice

Use a cookie sheet to line your 8 ramekins together. This makes it easier to transfer in and out of the oven.

In the bottom of each ramekin, add chicken.  See photo.


In a large sauce pan, heat olive oil and add spinach.  Toss for 2-3 minutes until wilted.  Add the spinach to the ramekins on top of the chicken.  See photo.


In a saucepan, a bit more olive oil and saute onion and garlic.  Add broth, cream and water.  Bring to a boil.  Reduce heat and simmer 10 minutes.  Sauce should start to get thicker the longer it has simmered. Ideally you want about one cup of reduced broth/water/cream sauce.

Remove from heat once desired thickness has been reached and stir in 4 tablespoons of grated parmesan cheese, lemon zest and juice.

Add the sauce to the top of each ramekin, over the spinach.

Add the remaining Parmesan Cheese to each cup.


Turn oven to broil.  Add cookie sheet with ramekins and broil for 3 minutes or until cheese is melted.

Serve immediately or pour onto plates and serve.


Tuesday, September 18, 2012

Eggplant Parmesan Casserole


I have argued back and forth with myself if I should share this recipe or not.

The flavors of zucchini, eggplant and cheese paired with a homemade marinara sauce and cooked slowly over a few hours have created a casserole that left my tummy very satisfied.

With a satisfied belly and flavors that proved to be wonderfully matched, why would I not want to share this dish?

Quite simply, the dish was difficult to photograph.  I could have spent more time arranging each piece of eggplant, every drop of sauce or place the spinach just right.

There is a bit of chatter among bloggers and photographers about how much is too much when it comes to photographing food.

I admit that I spend more time than some because I want the presentation and the props to create a mood, setting or feel along with the food that is presented.  This is not from a desire to have the perfect dish but more from a sense of working in the business, experience and years of looking at food in magazines, papers and on blogs.

When I first started years ago I did not know all of the tricks of the trade.  My lighting was off, the silverware was placed wrong or my focus was off, too much bokeh usually.  Bokeh is the blur you create in the background of most images.

It took me lots of trying, playing, researching and developing of my own skills before I started taking the pictures I wanted.  Even today I get all jelly-legged and excited when I come across a blog or picture that causes me to stop and stare in awe.  When this happens I reevaluate my own photography skills and try to determine what I need to improve upon.

I believe that we are in a constant state of improving when it comes to mastering our own craft.  My craft happens to be photography and cooking.  Someone else's may be sewing, computer programming or design.

Getting back to this recipe, I felt that the images would not conjure up the desire in my readers to give this dish a try solely on the basis of the image.

When I see the pictures this is how I feel, this is what it invokes in me.  My mind is a dreamer, a drifter and a romantic.   I see a hearty meal prepared by loving hands.  I want to imagine a family that has been hard at work in the fields of the farm, working the soil and creating a deep hunger with in themselves as the hours pass by.  I go back to a time with castles, moors and moats.  I see the tartan plaid worn by the village people, the pottery plate and the silver utensils.  All  ready to hold the feast that is rich in flavor, texture and color. It stirs a warmness in my belly.  I see the sauce being soaked up by a loaf of warm bread.  I see a meal that is fit for a hungry man.


A picture is worth a thousand words.  It tells far more than we may want to believe.  It is the first contact that you have with a recipe.  It stirs your taste buds, reminds you of a memory.

This is why I was worried that you may or may not find this dish appetizing.  If you have made it this far I am grateful that you took the time to dig a bit deeper.  The Eggplant Parmesan Casserole is a keeper in my home.  It may not look like much but I can't wait to prepare it again.

When a recipe does that to a person, then you know it's a winner.

Recipe:  Eggplant Parmesan Casserole


  • 1 large eggplant, peeled
  • oil for pan
  • 2 cups of flour
  • salt and pepper
  • 1 cup of milk
  • 1 egg
  • 2 cups of fresh spinach, washed
  • 1 medium zucchini, sliced 1/4 inch
  • 5 slices of provolone cheese
  • 1 package of fresh mozzarella, the log
  • 1/2 cup of parmesan cheese, finely grated
  • 4 cups of marinara or meat sauce, homemade or store bought

NOTE:  To make this dish gluten free, I used an equal combination of almond meal and brown rice flour to dip my eggplant in.  You can also use white rice flour.

Preheat oven 350.  This dish was created to use in dutch oven or deep oven proof stone bowl.  Below is a picture of the dish that I used.


To prepare the eggplant: Peal the eggplant with a potato peeler.  This makes the eggplant less bitter. Slice the eggplant into 1/4 inch slices.  Heat oil in a large saute pan.  Place the flour, salt and pepper in a small bowl.  Add the milk and one egg to another bowl.  Dip each slice into the milk and then the flour.  Fry on each side until golden brown.  Set aside.

When you have the eggplant fried, zucchini sliced, spinach washed then you are ready to start layering your dish.  I mixed and matched my layers with veggies, using the three cheeses through the dish.

This is an example of how I layered mine.

sauce
spinach
parmesan cheese
eggplant
mozzarellaCheese
sauce
zucchini
provolone Cheese
eggplant
mozzarella Cheese
sauce
zucchini
spinach
sauce
mozzarella cheese

Cover the casserole with a lid or foil.

Bake the casserole for 1 hour and let it rest for 20 minutes.


Pictures below will help you see some of the layers.


Wednesday, August 8, 2012

Pork Chops, Potatoes and Gravy


I love a meal that is prepared and baked all at once.  Pork chops, gravy and potatoes are a sure way to bring your family running to the table when they hear the call for dinner.


Recipe: Pork Chops, Gravy and Potatoes

Serves: 4
Prep time: 30 minutes
Cook Time: 2 hours

4 thick boneless pork chops
1 egg
2 T. milk
1/2 cup of flour ( I use almond meal and brown rice flour, 1/4 cups of each--for gluten free option)
salt/pepper
2 T. oil, for frying pork chops

1 medium onion, sliced
1 cup of mushrooms, sliced
2 T. olive oil to saute

5 Yukon gold potatoes, sliced

1 stick of butter
1/4 cup of flour (you can use white or brown rice flour or potato starch--for gluten free option)
1 cup of milk
1 cup of heavy cream
1 pkg. of Lipton onion soup

Preheat oven to 350 F.

1. Heat oil in saucepan. Combine egg and milk, beat together. Combine flour, salt and pepper. Stir well. Take each pork chop and dip in milk bowl, then dip on both sides in the flour bowl. Add pork chop to hot oil and cook until golden brown on each side. Remove to a dutch oven style baking dish.
2. Slice potatoes 1/4 inch thick and set aside.

3. In a medium pan, melt butter. Stir in flour. Add milk and cream. Once sauce is thick, stir in onion soup mix. Remove from heat.

4. To saute onions and mushrooms, add 2 T. oil to pan and saute together until onions are soft.

5. You will layer your dutch oven like this: pork chops, sauteed onions and mushrooms, onion gravy and top with the sliced potatoes.

6. Cover and bake for 1.5 hours.


Monday, June 11, 2012

Creamy Rice and Veggie Casserole


When I say we eat a 25 pound of rice about every 3 months, I am not lying.  My family loves rice.  We have brown, white, flat, short, long, black, red, Japanese, Basmati and Jasmine.  The only one we don't use or own is INSTANT.  LOL

We just don't like the flavor of instant.  I own a rice cooker and if I plan my meals right I have no problem getting the rice done on time.

We eat rice for breakfast, lunch and dinner and on occasion, as a snack too.

I joke with my kids that when they go to college they will get three things: a rice cooker, a blender and a Nu Wave oven.

There are over 40,000 different varieties of rice.  If you would like to learn more about rice, this is a great place to start.  HERE.

My daughter loves to make rice and one thing we need to work on is portions…LOL  When she makes a batch it is always the largest that can be made with our rice cooker.  We usually eat it all in a few days, but I personally like fresh rice better and not the rice that has been sitting in the fridge for a day or two.

What if you do have rice that is a day or two old?  I hate to waste food.  It makes me crazy when so many people in the world have so little.

In walks Creamy Rice and Veggie Casserole.  This not only uses your left over rice, but you can use your left over vegetables and cheese (if you like).

I will tell you what I used in my recipe.  If you change any of the veggies or cheese, just keep in mind that the flavor will be changed a bit too.  If you use those things you love then that should not bother you.  Be sure to let me know if you added your own twist to the dish.  It would work great to add some chicken to the casserole and make it a one dish "rock the house" meal.

This is a simple meal.  That has the taste of a gourmet dish.  ENJOY!


Recipe:  Creamy Rice and Veggie Casserole

4 cups of prepared white rice  (if you use brown rice it will have a nutty flavor)
2 cups of vegetables (I used: leeks, carrots, onions and red bell pepper)
1 teaspoon minced garlic
1 tablespoons olive oil
3 cups of milk
1/2 stick of butter
1/4 cup of flour
1 brick of cream cheese, soft
3/4  cup of cheddar cheese or 1 jar of Old English Cheddar Cheese

Preheat oven to 350.

Prepare your rice or use your left over rice from a previous meal.

Thinly slice and dice your veggies to make 2 cups.  Saute the veggies in a saute pan with the olive oil.

In a medium size pot, add butter and melt.  Sprinkle flour over butter and whisk for 2 minutes.  Add your milk and cook until thick, stir often.  Remove from heat and add cream cheese and cheddar. Stir until the cheese is well combined.

If you would like to add meat to this dish, go ahead and prepare your meat.  Add this to the mixture.

In a large bowl, combine sauce, rice and veggies.  Stir well and pour into a baking dish.  I used an 8X12 baking dish, so if you use a 9X13 reduce cooking time by a few minutes.

Bake for 30 minutes.


Monday, December 26, 2011

Chicken Enchiladas

Chicken enchiladas have been a Watson staple for as long as we can remember.  When I married into the family almost 24 years ago, this was a favorite dinner.  We would have it served with pea salad and bread rolls.  Oh, we all clamored to get a seat up front and we always wanted leftovers.

I can't count the number of times I have made these for our family over the years.  I have shared this recipe with lots of friends along the way too.  I am shocked that I have not shared or posted this recipe in the past.

You can tell from the title that I changed one of the main ingredients…we wanted to try something different and so we did.  We took our beloved chicken enchiladas and made them into turkey enchiladas.

Oh, they were very good and we will make these again.  The turkey does have a stronger flavor than the chicken.  I don't mind this change.  I served the enchiladas with the yummy breadsticks from The Pizza Factory.  I make them myself and they are always an extra bonus for my family.

I will tell you though, I do not use store-bought Cream of Chicken soup anymore.  It has a funky flavor to me and I would rather eat something with fewer ingredients too.  I make my own cream soup and add this to the enchilada mix.  You can use mine or the canned version of cream of chicken soup.

For the cream of chicken soup:

6 T. butter
1/4-1/2 cup of flour (more for a thicker soup)  FOR GF- use white or brown rice flour
1 tsp. minced garlic or 1/2 teaspoon of garlic salt
1/2 tsp. onion powder
2 cups of milk
2 cups of chicken broth
salt and pepper
1/2 cup of chicken pieces ( I don't add this when making it for the chicken enchiladas though)

Melt the butter in a small pan. Add the garlic, onion powder and flour; cook for 2 minutes.  Slowly add milk and broth. Stir often and bring to a boil.  Salt and pepper to taste.  As the soup sits it will also thicken a bit more.  This will make 4 cups.  Always taste it before you use it to see if it might need a dash more seasoning.

Chicken or Turkey Enchiladas

2-3 cups of chicken or turkey pieces
1/2 cup of green onion
2 cups of cream of chicken soup OR 2 cans of soup, like Campbell's
2 cups of sour cream
3 cups of shredded cheddar cheese (save 1 cup for the top of the enchiladas)
20-24 corn tortillas
oil to cook tortillas in

NOTE:  If you don't want to roll the corn shells into enchiladas the alternative is to make it like a lasagna...layer the chicken sauce with the tortillas.  It turns out just as good and takes less time.  Cook time is the same.

In a large bowl combine the first 5 ingredients.  Stir until well blended.  Try to save about 1.5 cups of mix for the top of your enchiladas (see picture below).

*If using the homemade cream of chicken soup, your sauce will be thinner then if you used the can.  If you used the can and you feel it's too thick, you can add milk to thin it a bit.

Prepare your corn tortillas by cooking them in oil for a few minutes and cooling in between paper towels to soak up any extra oil.

Once your mix is made and the tortillas are cooked, you can start preparing the enchiladas.  I use a scoop and add about 2 T. of mix to each corn tortilla and line them up in a baking pan.  I can fit 10-12 in each of my smaller pans or 20-22 in a 9X13 pan.


With the remaining chicken/turkey mixture, top cover all of the tortillas.  It does not have to be a thick amount, just enough so the corn tortillas do not get hard when baked.


Top the enchiladas with the remaining cheese.


Bake at 350 for 30 minutes or until bubbly.


Written by Sherron Watson

Thursday, July 21, 2011

Corn Casserole


I visited my sister-n-law, Amy, a few years ago and she made this casserole that was so delicious!  It was warm, creamy and full of corn.  I tried really hard to not eat the whole thing, let alone lick the plate clean.  I had to have the recipe and she shared.  The original recipe was from Jiffy and can be found here.

I have not had this recipe in almost 2 years because of the fact that I cannot eat wheat.  Jiffy is made with wheat.  While at the Fancy Food Show in DC, I met Bob Hodgson from Hodgson Mill.  They have a great line of gluten free mixes and flours.  I was so excited when they loaded me up with samples and mixes.  That made for a heavy trip home on the Metro...LOL and some rather strange looks.

I have used several of the products and they all have exceeded my expectation.  I made Flank Steak in the morning and I needed something yummy to go with it.  I saw the cans of corn and thought to myself, "I wonder if I could duplicate the corn casserole that I had ate in Idaho?".

I started looking around my house to see what I had and it hit me.  I had a yellow cake mix from Hodgson Mill.  Now, this is the great thing about gluten free products.  The ingredients are all listed and you KNOW what the ingredients are.  I know how they function together when combined.  This yellow cake mix was perfect!

So the adventure began and my fingers were crossed.  I can tell you that it was wonderful and had the same texture and taste as the original.  Thanks Hodgson Mill for making versatile product.


Corn Casserole...it's also Gluten-Free.

2 cans of corn, drained
1/2 cup of cream or milk
2 eggs, beaten
2 cups of GF Yellow Cake Mix ( I used Hodgson Mill)
1 stick of butter
1/2 c. plain yogurt
1/2 c. sour cream
1/2 tsp. garlic powder

Preheat oven to 375.

I make my own cream of corn.  Take one can of drained corn and the 1/2 cup of milk or cream.  Blend in a blender.  It does not have to be smooth just combined very well.

Add creamed corn and the remaining ingredients in a large bowl. Spray cooking oil into a 9X13 pan.  Bake for 30-40 minutes.  Use a tooth pick to decide if the center is cooked all the way through.

NOTE: I used a deep dish pizza pan to make my corn casserole.  I had enough mix that I could also make 6 cupcakes. These make great snacks for the kids.

This is not a paid advertisement for Hodgson Mill, I just really like their products.  ENJOY>


Saturday, July 16, 2011

Zucchini Puff Casserole


UPDATE 2020: We still eat this recipe at least once a month in the summer and sometimes in the winter. We love it!

It's summer and I can guarantee you that we will make this recipe at least 6-8 times before the zucchini surplus is over.  I found this recipe years ago in a cookbook.  I wish  I could remember the book, but all I know is the cover was a red and white check.  Any ideas readers?  LOL  


Everyone knows my love for cheese.  What I love about this recipe is it's easy, yummy and has the BEST cheese topping.  I wanted to post this recipe next week but I just found a blog hop on Julie's Eats and Treats and I want to participate.  I am here late Saturday night frantically writing up the post and recipe.  It's crazy how the foodie in me can get CRAZY excited about these little things in life.  But, they do make me happy...LOL


My oldest daughter absolutely loves this recipe.  It is her favorite.  I usually make 2 large pans and we eat it for every meal.  I have never tried the topping on any other veggie but I bet it would be just as yummy on any squash that you have in your garden or get from a friend.  ENJOY!

 Zucchini Cheddar Puff

2 lb. zucchini or yellow squash (sliced 1/4 inch thick) 7 cups
1 c. dairy sour cream
2 egg yolk, beaten
2 T. all-purpose flour (GF flour blends work well too)
1/2 tsp. onion salt
1/4 tsp. pepper
1.5 c. shredded Cheddar
3 egg white
4 T. seasoned bread crumbs (I use GF bread crumbs)
2 tsp. butter

1.  In a medium saucepan cook squash, covered in a small amount of water for 3 to 5 minutes. Drain well and spread evenly into a 9X13 pan.


 2.  In a bowl combine sour cream, egg yolk, flour, onion, salt, and pepper. Stir in cheese. 


3.  In a bowl beat egg whites until fluffy stiff peaks form. Fold into sour cream mixture. Spoon onto squash. Mix bread crumbs and butter together and sprinkle over the dish. 

4.  Bake at 350 degrees for 20 to 25 minutes.


NOTES:  I like a lot of the "puff" on my zucchini, I have made the recipe 1.5 times and it works well.  This recipe heats very well in the microwave the next day.


Written by Sherron Watson

Donut Breakfast Casserole

--------------------------------------------------------------------------------------------------------------- 1.  Share  this pos...

Popular Posts